Building a Safe and Sturdy Crib: A Free Woodworking Project
Building a crib might seem daunting, but with careful planning and readily available free woodworking instructions, you can craft a beautiful and safe sleeping space for your little one. This project requires precision and adherence to safety standards, so take your time and enjoy the process of creating a lasting heirloom. Remember, safety is paramount; always check local safety regulations and standards before starting and during your project. This guide offers a general overview, and you should adapt it to the specific instructions you find online.
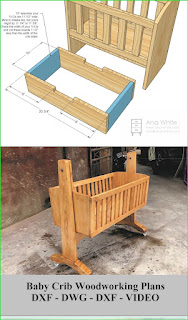
Finding Your Free Plans
The internet offers a treasure trove of free woodworking plans. Websites dedicated to DIY projects, woodworking blogs, and even some furniture retailers provide detailed blueprints and instructions. Start your search by using specific keywords like "free crib plans," "DIY baby crib plans," or "Ana White crib plans" (a popular resource). Carefully review several sets of plans to find ones that match your skill level and the type of crib you envision. Pay close attention to the materials list â€" ensuring you have access to the specified wood types and dimensions is crucial. You’ll also want to examine the intricacy of the joinery â€" simpler joinery is easier for beginners.
Gathering Your Materials and Tools
Once you've selected your plans, meticulously gather the necessary materials. Accuracy is key; purchasing the wrong size wood will significantly impact the crib's structural integrity. The plans should specify the type and quantity of wood needed, along with any hardware like screws, dowels, or specialized fasteners. Don't skimp on quality; opt for high-quality lumber designed for furniture making. For tools, you'll need a basic woodworking arsenal including:
- Measuring tape and square
- Circular saw or miter saw
- Drill with various drill bits
- Screwdriver (or impact driver)
- Sandpaper (various grits)
- Wood glue
- Clamps
- Safety glasses and hearing protection
Consider adding a planer and jointer to your tool list if you want to work with less-than-perfectly milled lumber. These power tools ensure smooth, flat surfaces for better joints and a more professional finish.
Step-by-Step Construction: Following the Plans
With materials and tools assembled, begin following your chosen plans precisely. Most plans break down the construction into manageable steps, often with accompanying diagrams or photos. Take your time, and don't rush. Precise cuts and accurate assembly are critical for safety. Double-check measurements at each stage; using a square to ensure right angles is particularly important. Follow the instructions meticulously regarding the application of wood glue and the tightening of screws or other fasteners. Always prioritize safety and wear appropriate personal protective equipment (PPE).
Finishing Touches and Safety Checks
After assembling the crib, thoroughly sand all surfaces to a smooth finish, paying attention to any sharp edges or corners. Apply a child-safe finish â€" non-toxic paint or varnish is essential to prevent any harmful chemicals from coming into contact with your baby. Once the finish is dry, perform a rigorous safety check. Ensure all joints are secure, screws are tightened, and the crib meets all relevant safety standards, including slat spacing regulations. Consult the crib safety standards in your country or region; these standards outline crucial dimensions and spacing to prevent entrapment hazards.
Building a crib is a rewarding experience, culminating in a handcrafted piece that will be cherished for years. Remember, patience and meticulous attention to detail are key to ensuring a safe and sturdy crib for your little one. Enjoy the process, and celebrate the accomplishment of creating a beautiful and functional heirloom.


0 comments:
Post a Comment